Create a list
Want to start a fresh list and invite others? You can do it straight from the extension in about a minute. You don't need to run a server — the extension talks to a shared server that's already built in.
If instead someone sent you an invite link, you're joining rather than creating — head to Join a list.
1. Install the extension
If you haven't already, install the extension and pin it to your toolbar.
2. Set your name
Open the popup, go to the Settings tab, and enter a display name so everyone can tell who added what.
3. Create the list
Open the Lists tab of the popup. Under Create a list, leave Server on Shared Shopping List (default), type a name in the New list name box, and click Create. Your list appears in the picker at the top, ready to use.
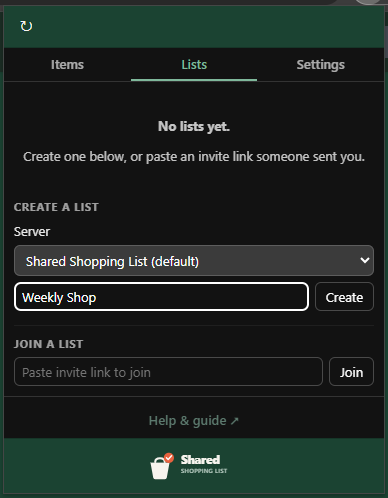
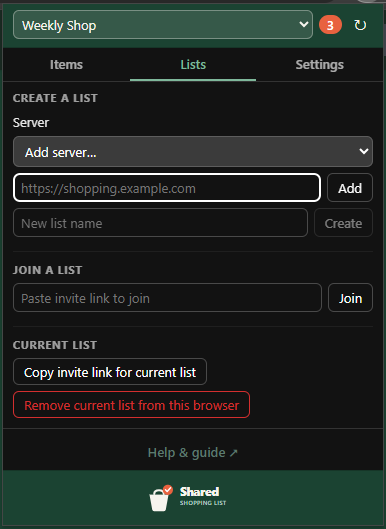
Running your own server? Pick Add server…, paste its address and click Add — it's checked before it's saved, and then it's available here whenever you create a list. Remove next to the picker forgets a server you added; it's hidden for the default one and for any server a list of yours still lives on.
4. Send the invite
With your new list selected, click Copy invite link for current list. That puts a link like this on your clipboard:
https://api.sharedshoppinglist.xyz/join/AbC123XyZ890
Send it to whoever should join — message, email, whatever. When they open or paste it, they're connected. Walk them through Join a list if needed.
Who can do what
Everyone on a list sees the same items and can add, action, undo, or delete them — there's no separate "owner" role once a list exists. Creating the list just means you're the one who made it and shared the first invite.
Creating a list is completely separate from hosting the server. The shared server is run centrally, and the extension uses it automatically. Running your own backend is a technical, opt-in topic covered in Run your own server.